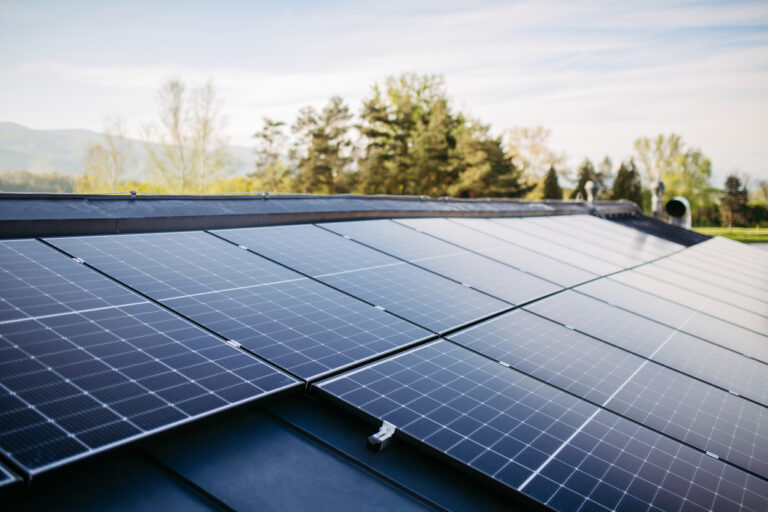
We all know they reduce our carbon footprint and hopefully our electricity bill too – but there’s so much more to think about when it comes to installing solar panels.
How will they look on your shiny white roof? How do you make sure they capture as much sunlight as possible? What happens when you need to upgrade them?
Your options depend on whether you’ll be retrofitting solar panels to your existing building or putting them up as part of a new construction – and there are good points and bad points with each.
Stratton Hatfield, Chief Sales & Marketing Officer at BE Solar in Pembroke, helped weigh up the pros and cons of the two types of installation.
NEW CONSTRUCTION
• PRO: They look good! Solar panels can be seamlessly incorporated into the architectural design of the building.
• PRO: You can design your roof to match your solar panel needs. A gable roof, which has two sloping sides, can accommodate more solar panels than a hipped roof, where all sides of the roof slope down.
• PRO: Catch the sun! You can optimise the orientation and tilt for maximum solar energy production.
• CON: Upfront costs. Your initial investment might be higher if solar is included in your construction budget.
• CON: Limited flexibility. A few years down the line, you may need to make modifications due to changing energy needs or technological advancements, which can be complicated and expensive.
RETROFITTING
• PRO: You’ll make energy savings straightaway. Existing buildings can benefit from solar energy as soon as the installation is complete.
• PRO: Flexibility. You can choose the most suitable system based on your energy consumption patterns and budget.
• CON: Aesthetics. It’s not always easy to seamlessly integrate the panels into the existing structure.
• CON: Structural considerations. Existing roofs may need reinforcement to support solar panels, or the roof gutter might need to be moved to fit more panels.
IF YOU’RE PLANNING TO INSTALL SOLAR PANELS, YOU’RE NOT ALONE.
Mr Hatfield said: “We’ve observed a steady rise in homeowners seeking to install solar panels, driven by the increased cost of electricity, growing awareness of environmental concerns, and the desire for energy independence. Solar has certainly become more common.”
“We see a steady increase in demand for clean energy, specifically rooftop solar.”
Since 2010, BE Solar has deployed one-third of the distributed solar energy on the island, which equates to more than 4.6MW.
People have traditionally ‘gone solar’ to try to lower their carbon footprint, but growing numbers are swayed by the chance to cut their energy bill: Mr Hatfield said you’ll get an average payback on your investment within five to seven years.
“The potential for long-term savings on energy bills and the availability of financial incentives often influence the decision,” he said.
“While environmental concerns remain a significant factor, economic considerations have gained prominence, especially with the availability of favourable financing options.”
Solar systems from BE Solar are low risk, Mr Hatfield said. They are guaranteed to produce energy for a minimum of 30 years, have no moving parts and will increase the value of your home.
So once you’ve decided to join the green revolution, how do you go about installing them?
Mr Hatfield shared the following step-by-step guide:
STEP 1 Assessment: Evaluate your energy needs. Weigh up your Belco bills and figure out your desired level of energy efficiency. How suitable is your site for solar panels? What’s your budget? How much could you save?
STEP 2 Design: Develop a customised solar system based on that assessment.
STEP 3 Permits: Complete the necessary documents from the Department of Planning.
STEP 4 Installation: Get professionals in to install the panels, microinverters, leak free roof attachments, electrical infrastructure and other components.
STEP 5 Inspection and approval: Ensure you comply with regulations and standards through inspection.
STEP 6 Activation: Connect the system to the Belco grid to begin harnessing solar energy and exporting any excess to the grid.
In Bermuda, it’s often tempting to cut costs by doing construction work yourself, but Mr. Hatfield insisted professional installation is important for safety, performance and compliance reasons. “DIY installation can pose risks and may void warranties,” he said.
“While DIY may seem cost-effective initially, errors or sub-optimal installation can lead to higher long-term expenses and decreased efficiency.”
He advised Sunny Side Solar offers DIY solar kits if a homeowner decides to go down the DIY road.
Other common mistakes include overestimating or underestimating the size of the
system to meet your energy needs, and failing to optimise panel placement for maximum sunlight exposure.
EVEN AFTER THE PANELS ARE INSTALLED, THE JOB IS NOT DONE YET!
Regular inspections and maintenance are vital to ensure optimal performance and longevity.
Mr Hatfield advised:
• REGULAR CLEANING. Remove dirt, dust and debris to maintain efficiency if there are periods without heavy rain.
• MONITOR PERFORMANCE. Keep track of energy production and address any issues promptly.
• PROFESSIONAL INSPECTIONS. Schedule annual inspections by qualified technicians to torque down panel attachments to ensure they can withstand wind loads and confirm electrical connections.

